Django datalogger

Sample datalogger with Django
Django datalogger

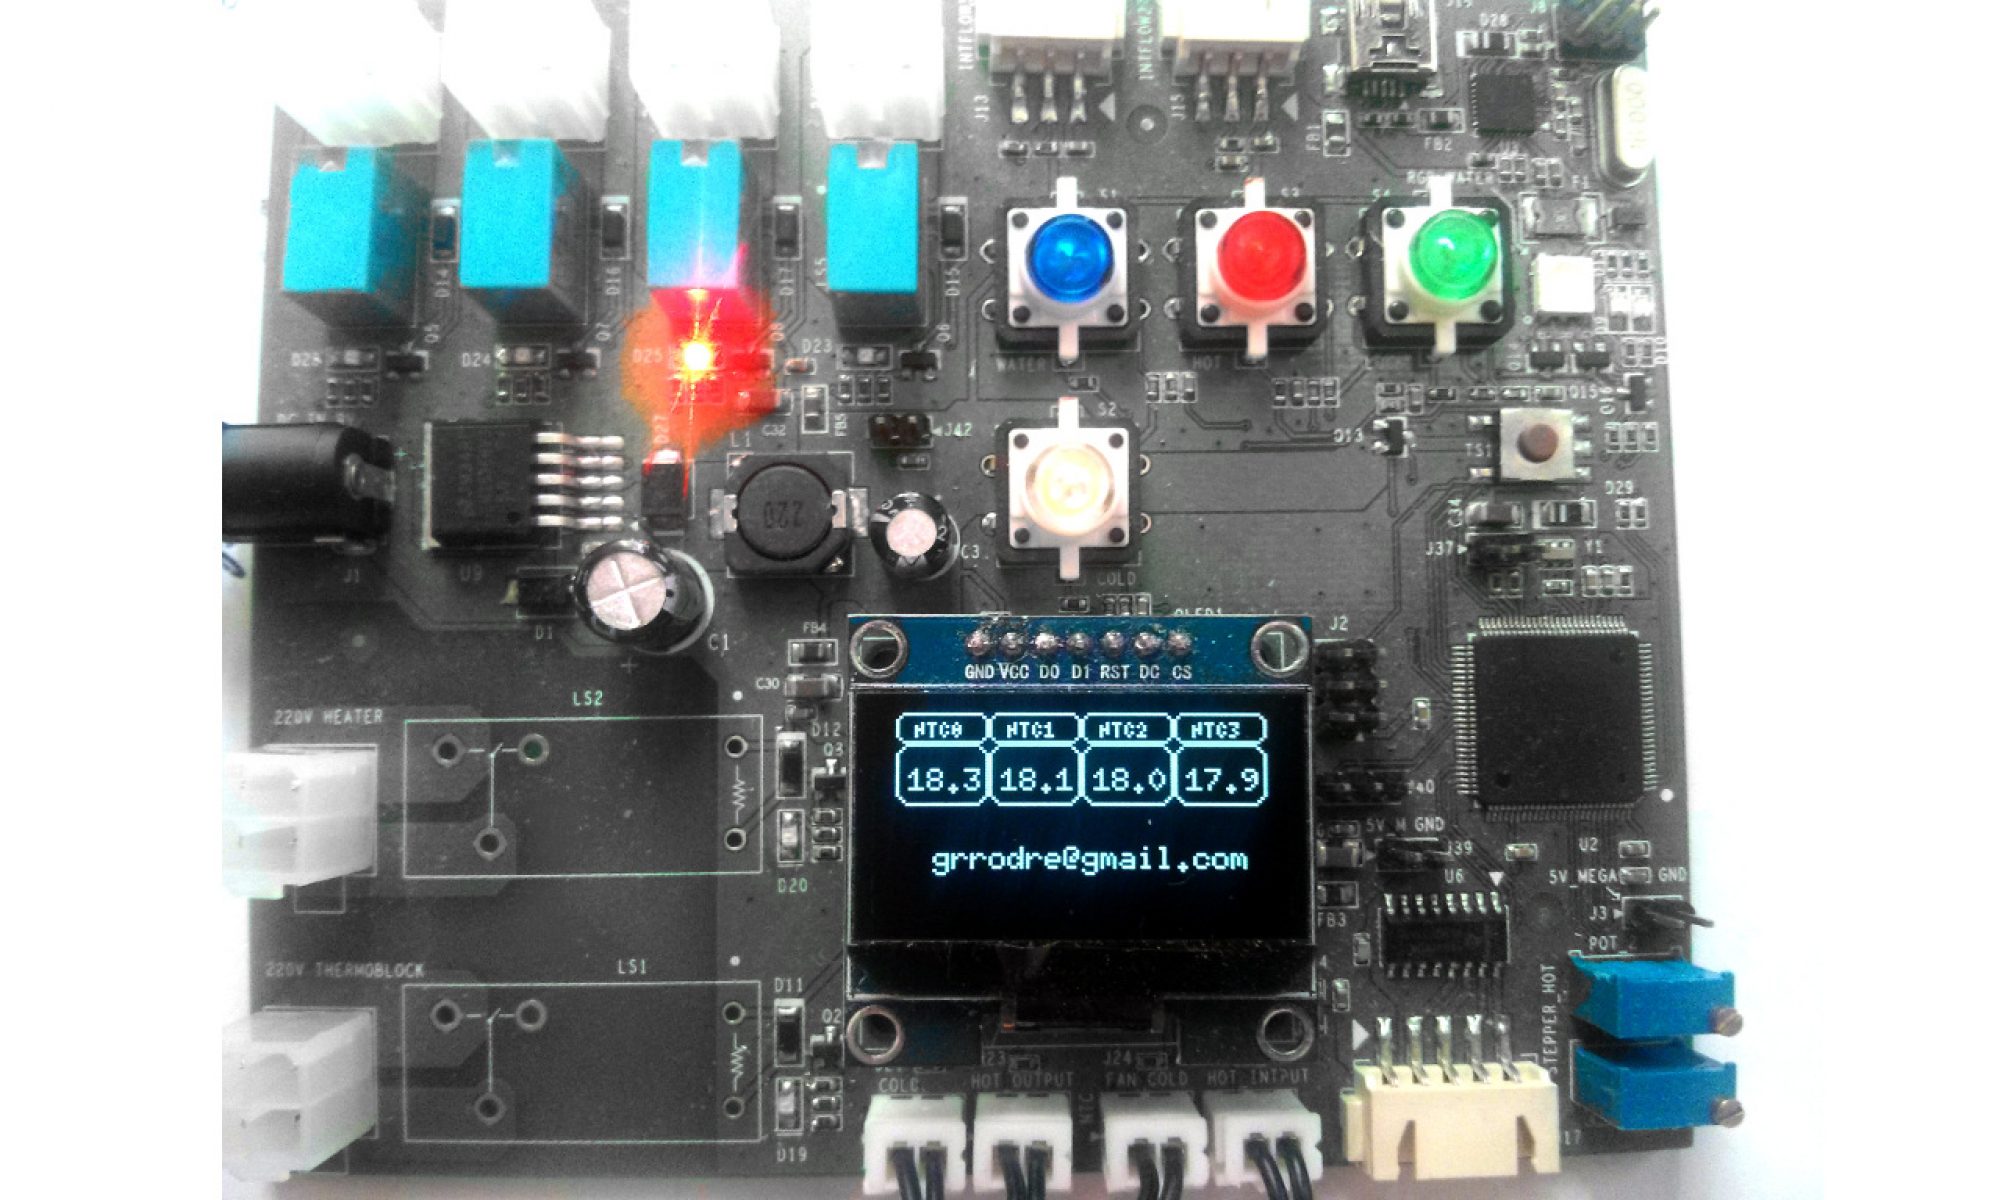
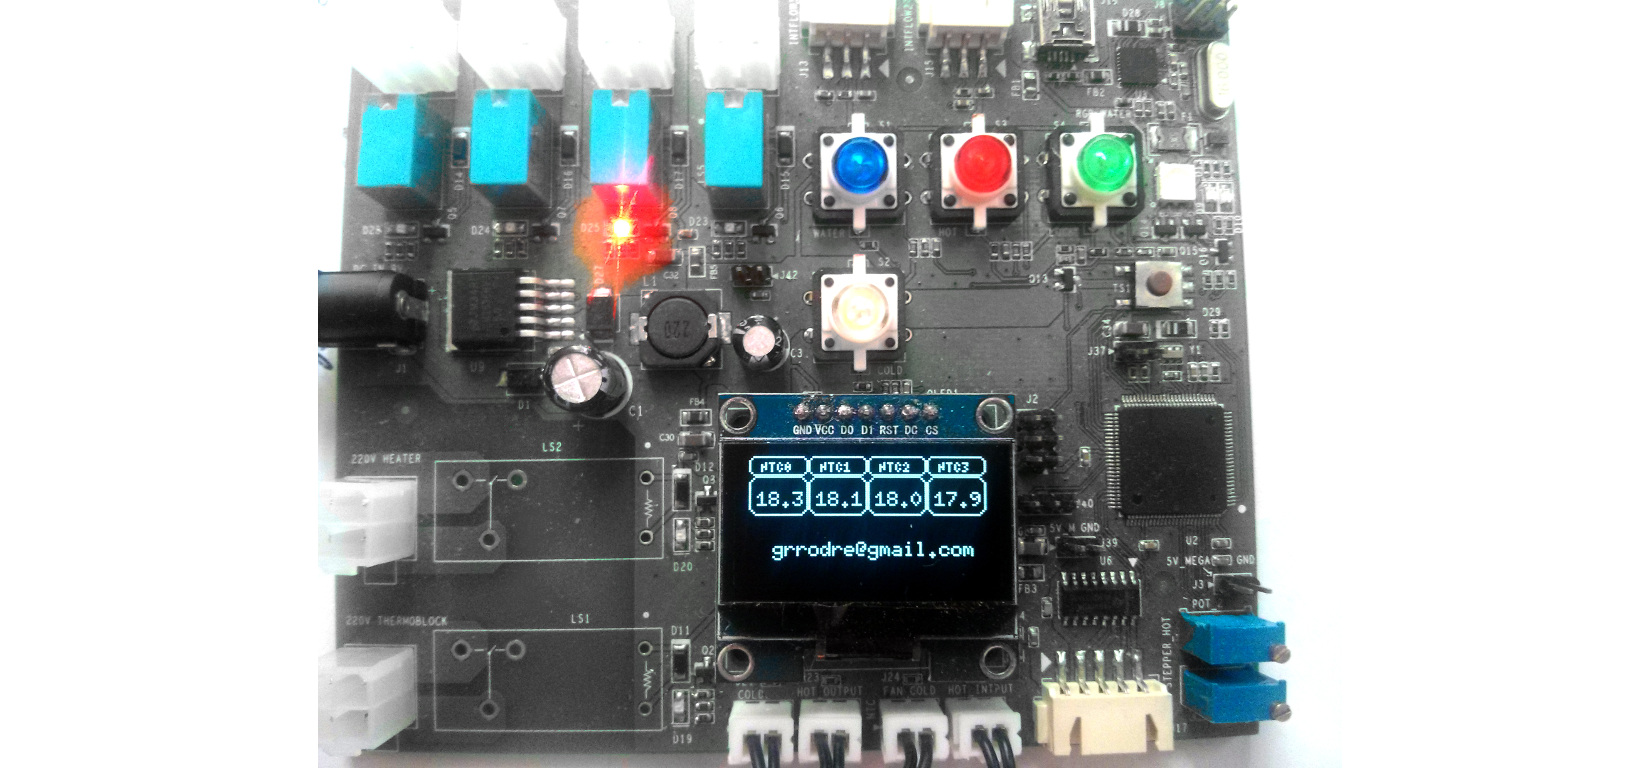
Here is a datalogger I have built with an old PCB from a project. The PCB itself has different sensors such as NTC, flow sensors, resistors and leds. I have used the NTCs sensors to retrieve the values every minute and send to a Server.
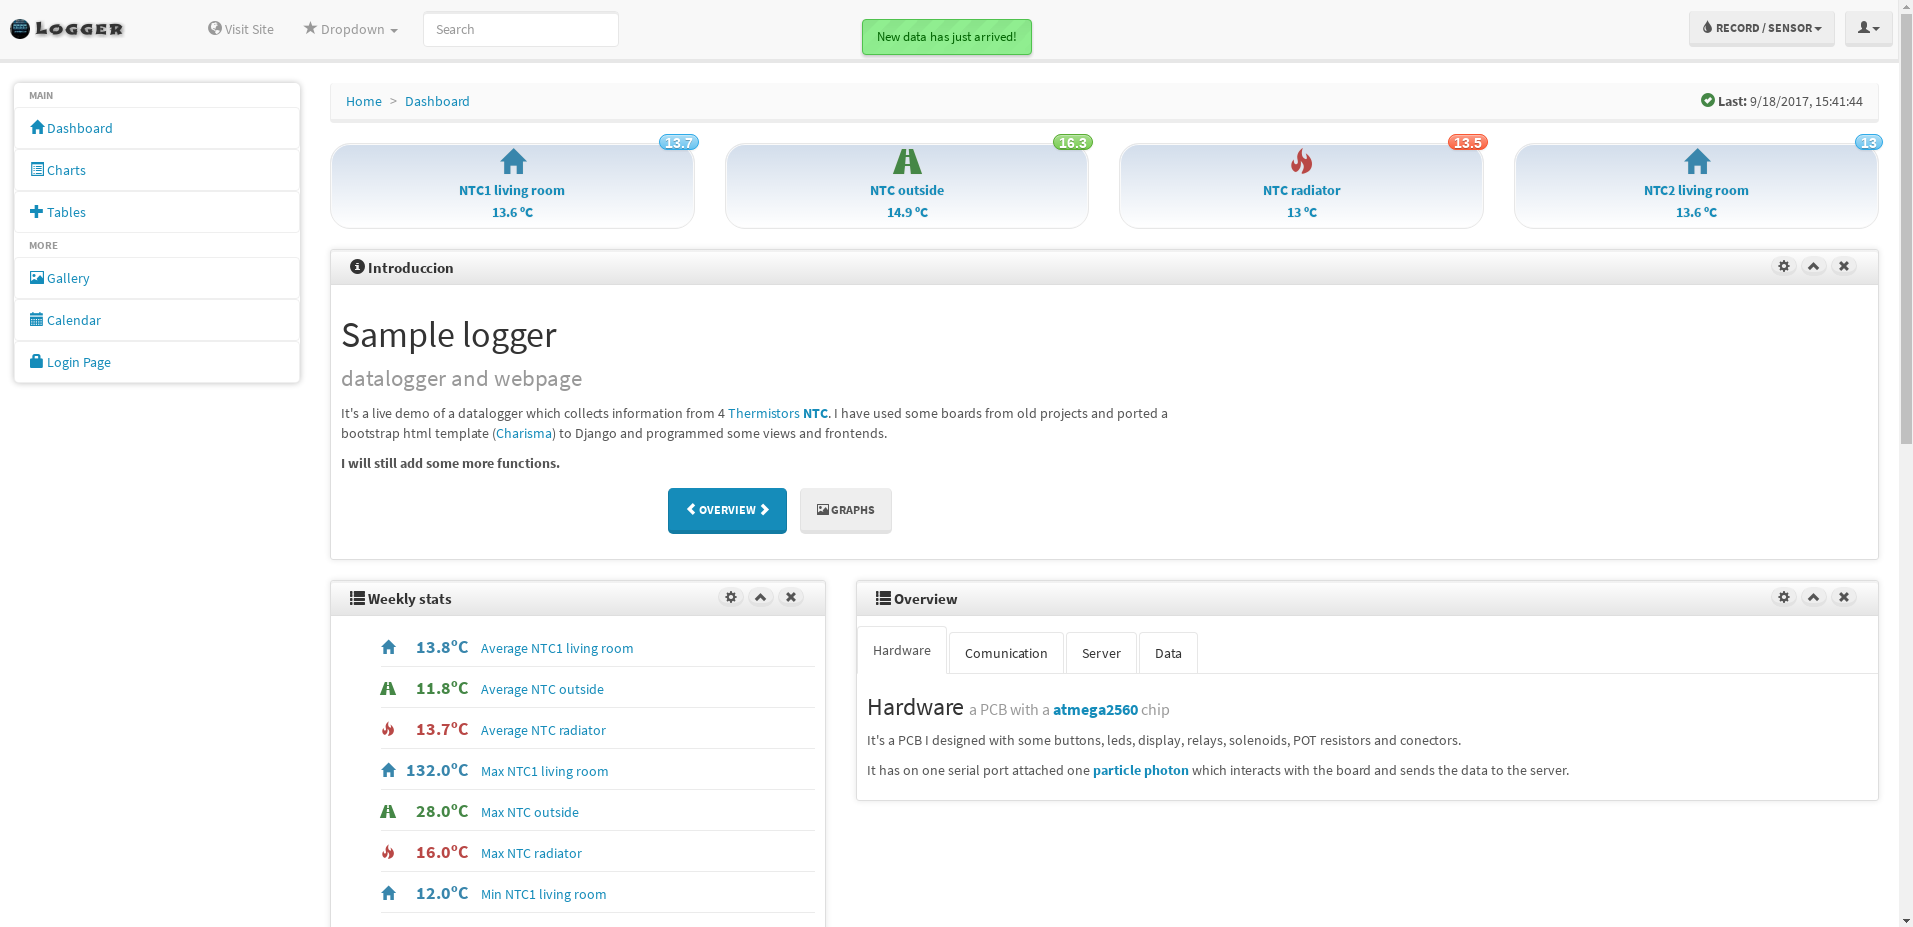
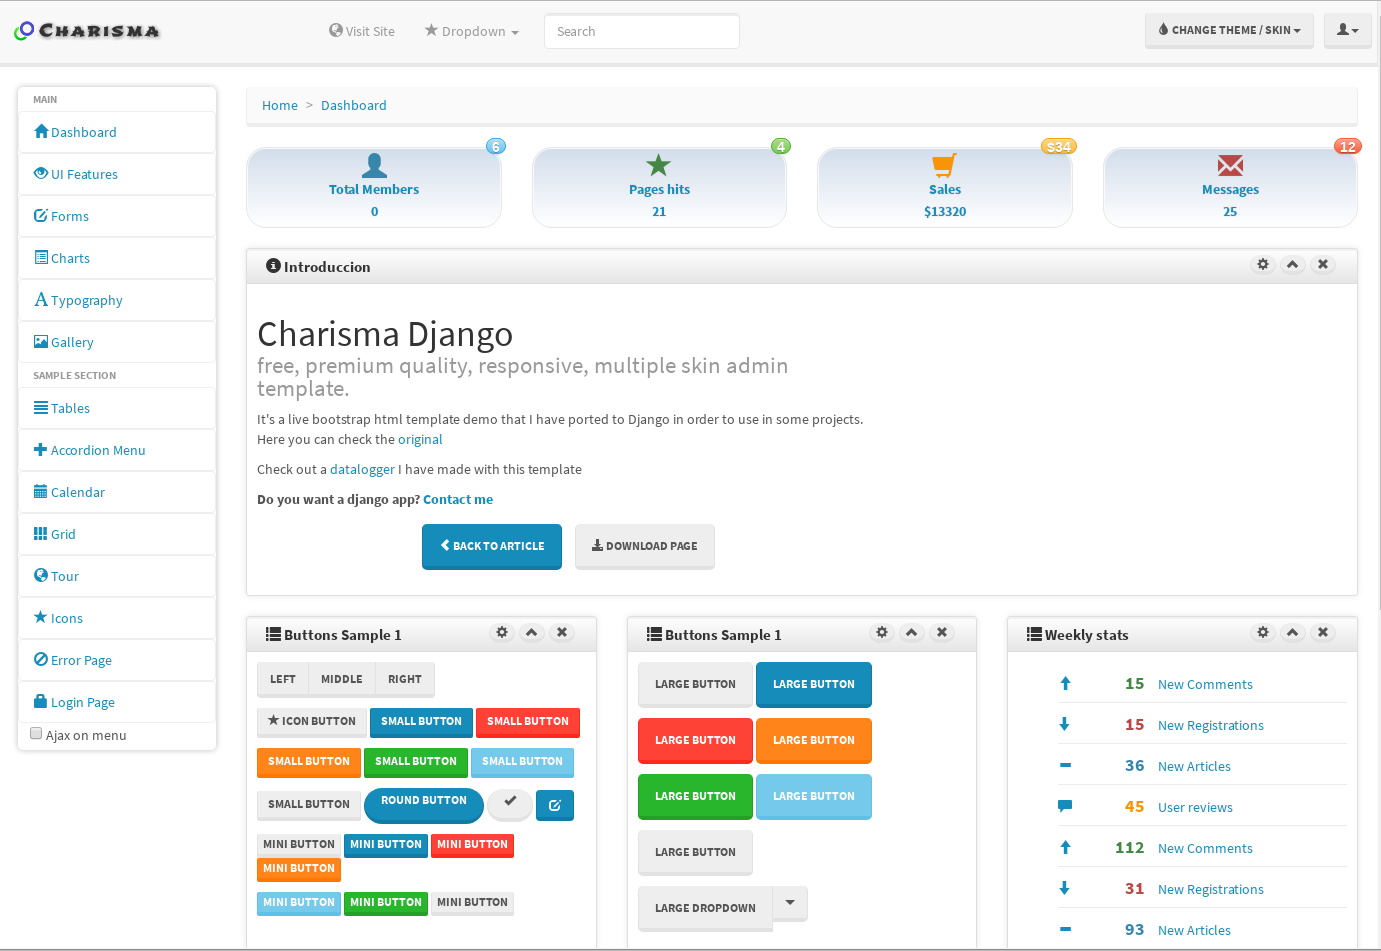
For this I have used Django and Charisma django, a port from a html template I have made (for more information visit this post).

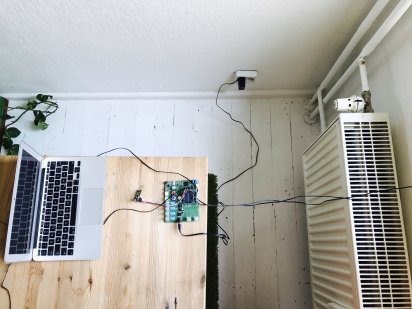
I placed a sensor outside my window, two inside the room and one inside the radiator. The microcontroller use ADC interrupts to poll the temperature and send it over serialport to a WiFi module. This WiFi module send the data to the server.

Check this project live here

PCB NTC
PCB with NTC

Free responsive django admin template

Free html admin template
Charisma django admin html template

I have ported charisma admin template from usman to django. Check the live version here.

To install use

pip install django-charisma

Collect static and add urls:

python manage.py collectstatic

You can modify the boxes and create/include in every page as follow:

{% extends 'charisma_django/base.html' %}
 {% block content %}
    {% include 'charisma_django/breadcrumb.html' %}
    {% include 'charisma_django/boxes/four_blocks.html' %}
  <div class="row">
   {% include 'charisma_django/boxes/introduccion.html' with colmdwidth='12' %}
  </div>
 
  <div class="row">
   {% include 'charisma_django/boxes/buttons1.html' with colmdid='buttons1' %}
   {% include 'charisma_django/boxes/buttons2.html' with colmdid='buttons2' %}
   {% include 'charisma_django/boxes/weekly_stats.html' with colmdid='weeklystats' %}
  </div>
 
  <div class="row">
   {% include 'charisma_django/boxes/member_activity.html' with colmdid='memberactivity' %}
   {% include 'charisma_django/boxes/tabs.html' with colmdid='tabs' %}
   {% include 'charisma_django/boxes/keep_in_touch.html' with colmdid='keepintouch' %}
  </div>
 {% endblock %}

I have created a datalogger with this template and old PCB from a project. Check it out here.

If you have some doubts do not hesitate to contact me at grrodre@gmail.com

How to set up Django, nginx, postgresql and gunicorn

This post is a guideline that I use to set up Django in linux.

Install nginx, virtualenv, pip and postgresql


apt-get install nginx virtualenv python-pip python-dev libpq-dev postgresql postgresql-contrib

Nginx will act as a proxy server and virtualenv will keep different Django’s instances separated.

Create a folder for the web. I will use /opt/DjangoWeb1/ and install there the virtualenv.


mkdir /opt/DjangoWeb1/
cd /opt/DjangoWeb1/
virtualenv venbdjango1

Log with postgres user and launch psql.


su postgres
psql

Create database for Django with postgresql.


CREATE DATABASE djangoweb1;
CREATE USER djangouser1 WITH PASSWORD 'djangopassword1';
ALTER ROLE djangouser1 SET client_encoding TO 'utf8';
ALTER ROLE djangouser1 SET default_transaction_isolation TO 'read committed';
ALTER ROLE djangouser1 SET timezone TO 'UTC';
GRANT ALL PRIVILEGES ON DATABASE djangoweb1 TO djangouser1;

Activate the virtual enviroment and install Django, gunicorn and support for postgresql.


source venvdjango1/bin/activate
pip install Django
pip install psycopg2
pip install gunicorn

Start Django project


django-admin startproject DjangoWeb1

Modify settings in order add database we have just created.


cd DjangoWeb1
nano DjangoWeb1/settings.py

DATABASES = {
    'default': {
        'ENGINE': 'django.db.backends.postgresql_psycopg2',
        'NAME': 'djangoweb1',
        'USER': 'djangouser1',
        'PASSWORD': 'djangopassword1',
        'HOST': 'localhost',
        'PORT': '',
    }
}

Migrate the database and create admin user


python manage.py makemigrations
python manage.py migrate

Add a service to run gunicorn as a webserver. I use systemd with this set up. Create a file  /etc/systemd/system/djangoweb1.service


[Unit]
Description=gunicorn daemon
After=network.target

[Service]
User=root
Group=www-data
WorkingDirectory=/opt/DjangoWeb1/DjangoWeb1
ExecStart=/opt/DjangoWeb1/venvdjango1/bin/gunicorn --access-logfile - --workers 3 --bind unix:/opt/DjangoWeb1/DjangoWeb1.sock DjangoWeb1.wsgi:application

[Install]
WantedBy=multi-user.target

Enable and activate the service


systemctl enable djangoweb1.service
systemctl start djangoweb1.service

Last step is to redirect web traffic through nginx proxy.


nano /etc/nginx/sites-available/djangoweb1

Set up the config file to point the socket gunicorn is linked to. For static files add in settings.py . Also allow all hosts to connect to the site.


STATIC_ROOT = '/opt/DjangoWeb1/DjangoWeb1/static/'
ALLOWED_HOSTS = ['*']

server {
    listen 80;
    server_name mydomain.com;

    location = /favicon.ico { access_log off; log_not_found off; }
    location /static/ {
        root /opt/DjangoWeb1/DjangoWeb1/static;
    }

    location / {
        include proxy_params;
        proxy_pass http://unix:/opt/DjangoWeb1/DjangoWeb1.sock;
    }
}

Enable the new site by linking in sites-enabled.


cd /etc/nginx/sites-available/
ln -s /etc/nginx/sites-available/djangoweb1 /etc/nginx/sites-enabled/
systemctl restart nginx

Now you can visit the webpage

Welcome Django
Django Website

If you want to create a ftp user to handle the files of the web visit the post How to set up proftd

How to set up proftpd in Linux

This post is a guideline that I use to set up proftpd in a linux server.

 I create a user group for FTP users and assign a specific home folder where the WEB is located.

 I am using Debian Jessy.
First step install package:


apt-get install proftpd-basic

Edit config file and add the following lines


nano /etc/proftpd/proftpd.conf


<Global>
    RequireValidShell off
</Global>

DefaultRoot ~ ftpuser

<Limit LOGIN>
    DenyGroup !ftpuser
</Limit>

This way we will handle ftp users by adding them to a group ftpuser without a valid shell. They will also be jailed in the user’s own home directory.

Create new group, user and asign him the home directory. I am using /var/www/wordpress_one as home directory.


addgroup ftpuser
adduser ftpuserone -shell /bin/false -home /var/www/wordpress_one
adduser ftpuserone ftpuser

Change the group permissions of the folder so apache or other web servers can work with it. Apply also the default group for new files created. This is usefull when wordpress or other program create new files.


chown ftpuserone:www-data wordpress_one/
chmod g+s wordpress_one/

Restart the service and test the user


service proftpd restart

ftp -nv yourftpdomain.com
220 ProFTPD 1.3.5b Server (Debian)
ftp> user ftpuserone
331 Password required for ftpuserone
Password: 
230 User ftpuserone logged in
Remote system type is UNIX.

Now web files can be uploaded over ftp directly.